
A Low-Impact Field Plan for Finding Sand Dollars
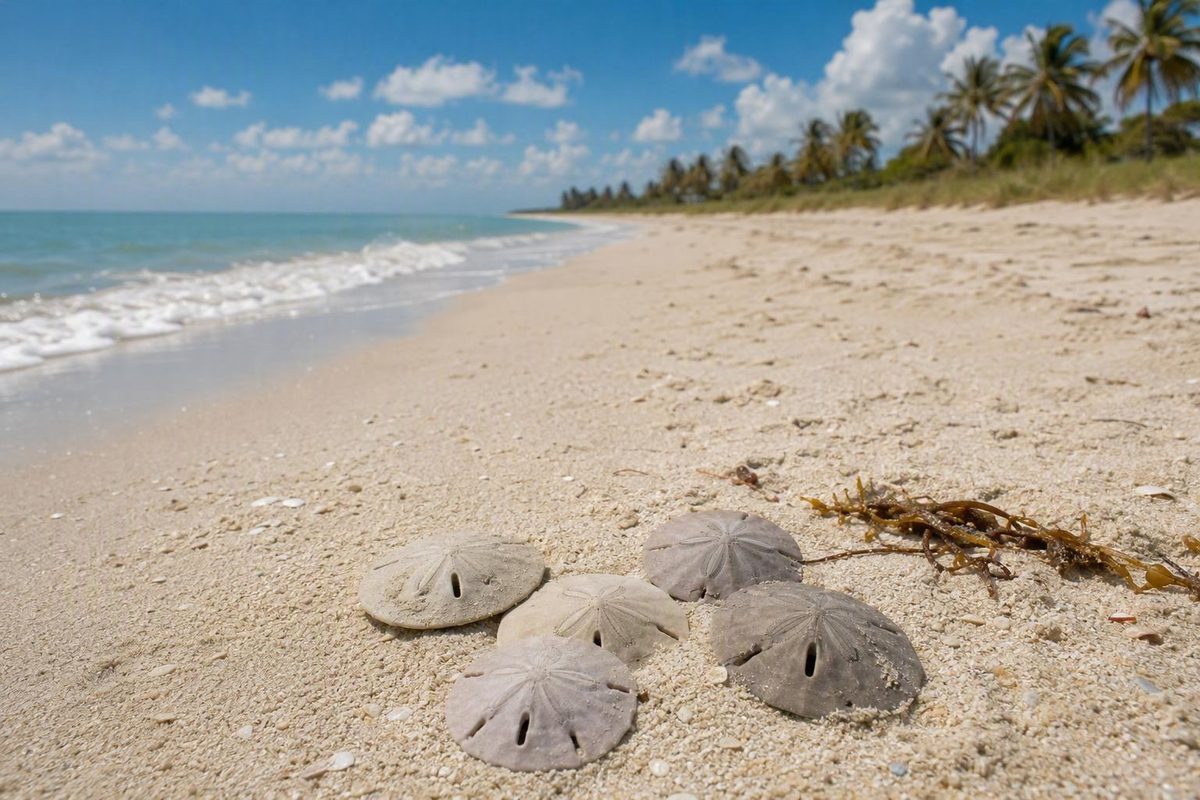
Scan recently exposed wet sand and the surf line. Beginners do not need to swim, snorkel, cross channels or reach offshore sandbars.
Learning how to look for sand dollars is mostly a lesson in planning, patient observation, and restraint. Instead of wandering the dry beach in search of perfect white discs, first confirm that sand dollars occur locally, check the tide and collection rules, and scan exposed wet sand and clear shallows for subtle shapes.
The most important decision comes after you find one: observe it before touching it. If it has spines, a fuzzy surface, visible movement, dark coloration, or any other sign that it may be alive, leave it where it is.
The seven-step sand-dollar search plan
Use this practical sequence for a first search:
- Confirm local presence. Ask the park office, beach manager, wildlife authority, nature center, or another knowledgeable local source whether sand dollars occur at that beach. A sandy shoreline alone does not prove that they are present or accessible.
- Check the current rules. Identify who manages the beach and consult that authority’s current policy on removing empty tests, shells, or other natural objects.
- Review the tide and conditions. Use current local tide information and favor a period when falling water may reveal wet sand or shallow habitat. Do not treat a predicted low tide as a reason to enter uncomfortable conditions.
- Begin on accessible wet sand. Search newly exposed flats, the moist shoreline, and the surf line before considering shallow water.
- Scan likely zones slowly. Look across exposed sand, ripple edges, shell deposits, and—when the water is calm and clear—ankle-deep shallows.
- Classify each find conservatively. Observe before touching. A dark, spiny, fuzzy, moving, or ambiguous specimen stays where it is.
- Protect any legal empty test. Support it gently and place it in a padded rigid container away from rocks, heavy shells, and beach equipment.
Low tide and suitable habitat may improve visibility and access, but they do not guarantee a find. Local species, sediment, waves, water clarity, season, burial depth, and chance all affect what appears along the searchable shoreline.
Start with the easiest ground to inspect. Recently exposed wet sand and the surf line offer a practical search area without requiring swimming, snorkeling, channel crossings, or a trip to an offshore sandbar. Those activities are not necessary for a beginner’s sand-dollar search.
As you walk, observe the sand rather than disturbing it. Do not rake, probe, dig, or shuffle aggressively to test whether something is buried. Disturbing the bottom can conceal outlines in suspended sediment and may interfere with embedded animals. If you notice a possible disc or curved edge, stop and look for texture, spines, movement, and color.
Bring:
- current tide information for the beach or nearest relevant station;
- the beach or park’s current rules;
- sun protection;
- drinking water;
- polarized sunglasses, if available;
- footwear suited to the beach surface; and
- a small padded rigid container for a legal empty test.
Think of the plan as a series of filters. First decide whether the beach is promising. Then determine whether the conditions and accessible search area are suitable for you. Only after finding something should you consider whether it is an empty test, legal to remove, and sturdy enough to transport.
Know what you are actually searching for
A sand dollar is not a coin-shaped mollusk shell. It is a flattened sea urchin associated with sandy or muddy ocean bottoms. The familiar pale object displayed as a souvenir is the rigid test left after the animal dies and loses its soft tissue and spines. The test is calcium-carbonate based and can be exceptionally fragile, particularly after exposure to waves and weather, as this sand-dollar anatomy overview explains.
That distinction changes what you should expect to see. A living sand dollar generally has numerous short, movable spines over its surface, giving it a fuzzy, felted, or velvety appearance. Depending on the animal, species, lighting, and sediment, it may appear brown, purple, gray, or green rather than white.
An empty test is more likely to be bare, hard, and pale. Sun and weather may eventually bleach it white, but not every dead test is bright white. A recently dead specimen may retain darker coloration or some spines, so color by itself is not a reliable collection test.
Location is not conclusive either. A loose, pale test on dry sand above the waterline is more likely to have been dead for some time, but empty tests can remain underwater or lodge in wet sand. A living animal can also be exposed as the tide falls. The useful question is not simply “Is it underwater?” but “Does it show spines, living tissue, movement, or uncertainty?”
Living sand dollars may be embedded flat or at an angle in the sediment, with only a small part of the rim visible. Empty tests may also become partly buried, settle beside a ripple, or remain beneath shallow water. Searching only for complete white discs means overlooking many of the shapes that make a careful search worthwhile.
Appearance differs among species and coastlines. Avoid treating one photograph as a universal model. For field decisions, the most useful features are:
- a disc-like outline;
- a protruding rim;
- short spines or a fuzzy surface;
- visible movement;
- darker coloration;
- burial position; and
- a bare, rigid test with no sign of living tissue.
Calling an empty test a “shell” is common in casual beach conversation, but the distinction matters. A living sand dollar is the animal itself. The white object commonly collected is the skeletal test that remains after the animal has died.
Choose the beach and plan around the tide
Before making a dedicated trip, find out whether sand dollars are known from the intended beach. Contact the relevant park office, municipal beach office, wildlife authority, nature center, or another informed local source. Ask whether sand dollars occur there, where visitors may walk, and which authority controls collection.
Local confirmation is a planning aid, not a promise of abundance. Conditions can change on a beach where sand dollars have been found previously. Sediment may shift, water may become cloudy, waves may bury or break tests, and living animals may remain outside the easily visible area.
Several beachcombing and destination guides recommend low tide because falling water can reveal wet sand, flats, and shallow bottom that were previously covered. Use a tide table for the beach or nearest relevant station, then consider searching as the tide falls toward low water. A Beachcombing Magazine account likewise describes especially low tides, exposed shoreline, and clear shallow water as useful search conditions, while presenting much of its advice as personal field experience.
A broad, gently sloping flat does not respond like a steep surf beach, and tidal patterns differ by location. The practical goal is simply to inspect newly exposed ground without relying on a narrow or hurried window.
Clock time matters less than the actual search conditions. Prioritize:
- a useful tide stage;
- open, lawful access;
- visible bottom where shallow water is considered;
- manageable conditions for your own ability;
- adequate daylight; and
- a straightforward search area close to shore.
Morning is not inherently best. If a favorable tide occurs later under clearer and more comfortable conditions, that may provide a better opportunity than an early search with poor visibility.
Storms create a tradeoff rather than a guarantee. Strong wave action may shift sediment or leave tests and fragments near the surf line, but it may also break fragile tests. Search only after the beach is open and the conditions have settled enough for an ordinary shoreline visit; post-storm recommendations in beachcombing sources are anecdotal, not evidence that a storm will produce intact specimens.
Manage expectations even when the plan looks promising. A falling tide on a suitable sandy beach may expose a large search area and still yield nothing. Habitat, recent wave action, visibility, season, local species, burial depth, and luck all influence the result.
Search the beach in a safe, efficient order
A zone-by-zone method provides a conservative framework and reduces unnecessary wading. It is a practical search order, not a scientifically established ranking of habitat.
1. Recently exposed wet sand and flats
Begin where falling water has uncovered smooth wet sand or sandy-to-muddy flats. Walk parallel to the shoreline and inspect a narrow band at a time. Pay particular attention to ground that has only recently emerged.
Look across raised ripples and along their edges. A partly buried test or animal may interrupt the regular pattern with a curved rim, partial circle, shallow depression, or contrasting patch.
This zone is relatively easy to scan and gives you time to learn the shapes without entering the water.
2. The surf line
Next, inspect the area where waves have recently deposited light material. Pale empty tests may wash above the waterline, while pieces can collect with shells or plant debris.
Fragments are a reason to slow down, not proof that an intact test is nearby. A broken piece does not show when the material arrived, how far it traveled, or whether a whole test survived.
Keep the search within the part of the shore you are comfortable walking. If changing water movement makes the area unsuitable for you, move back to dry ground.
3. Shell deposits
Inspect shell lines and small accumulations of natural material. Sand-dollar fragments may blend into pale shell pieces, and an intact test may be partly covered.
Search visually instead of dismantling the deposit. The presence of shells does not prove that the area contains sand dollars, and there is no need to toss aside natural material in pursuit of a possible find.
4. Clear ankle-deep water
When the water is calm, shallow, and clear enough to see the bottom, you can scan sandy ankle-deep areas. Stand still periodically so disturbed sediment settles. Keep the sun behind you when practical, and use polarized sunglasses to reduce surface glare.
Do not assume that entering progressively deeper water will improve the search. This plan ends at shallow wading; swimming, snorkeling, channel crossings, and offshore sandbars are separate activities requiring their own preparation and local guidance.
A pale empty test may remain underwater, so submersion does not prove that a specimen is alive. Embedded or dark specimens require especially conservative observation for spines, texture, and movement.
5. Stop before the search becomes a different activity
Advice written for a particular Gulf, Atlantic, or Pacific beach should not automatically be transferred to another shoreline. Search methods involving deeper water, offshore bars, diving, or watercraft are location-specific and outside this beginner plan.
If likely habitat lies beyond the accessible wet sand or calm shallows, try another beach or tide rather than turning beachcombing into an unplanned swim.
How to spot a sand dollar that is mostly buried
The central skill is not exceptional eyesight. It is slowing down enough to notice an interruption in an otherwise regular sand pattern.
Choose a narrow strip and scan it methodically. On the return walk, inspect the adjacent strip instead of following exactly the same visual path. A fast walker looking only for complete white circles can pass over both buried tests and living animals.
Watch for five principal clues:
- A protruding curved rim. A small arc may be the only visible part of a disc beneath the sand.
- A partial circular outline. Wet sand may reveal a faint boundary while the center remains covered.
- A shallow round depression. A lightly buried object may produce a subtle circular or dish-shaped change in the surface.
- An unusual patch. A difference in texture, grain pattern, or sediment movement may warrant closer observation.
- A color contrast. In clear water, a pale or dark disc-like area may stand out against the surrounding bottom.
Regional search guides mention round patches and depressions as possible signs of partly buried sand dollars, but these shapes can have many causes. Treat them as visual prompts, not invitations to dig. An Island Life NC field guide describes partial burial and also emphasizes the fragility of exposed tests.
In shallow water, examine the edges of raised sand ripples. Receding water may remove a thin layer of sediment and reveal part of a rim. Newly uncovered flats are useful places to practice because their surface patterns may be easier to read.
Use available light carefully. Keeping the sun behind you may reduce reflected glare, while polarized sunglasses can make the bottom easier to see in clear water. Neither technique will overcome foam, turbid water, or suspended sediment.
Look rather than feeling around with your feet. Aggressive shuffling, scraping, probing, and digging can disturb embedded animals and cloud the water. If you see a possible edge, stop and examine it in place.
Watch for movement across the surface and assess its texture and color. Do not pry a specimen free merely to identify it. Living sand dollars may be flat or angled within the sediment, and uncovering one defeats the purpose of a low-impact search.
Calm, clear water makes visual scanning easier, but it does not mean sand dollars are present. If repeated passes reveal nothing, try another exposed zone or accept the result rather than escalating to more intrusive methods.
Living animal or empty test? Use a conservative decision rule
Identification should begin with observation in place. No single color, position, or water depth settles every case, so combine visible clues and let uncertainty stop collection.
| Category | What you may see | What to do |
|---|---|---|
| Likely living | Short movable spines; a fuzzy, felted, or velvety surface; visible movement; brown, purple, gray, or green coloration; partial burial in sandy habitat | Leave it undisturbed |
| Likely empty test | Hard, bare surface without spines; pale or sun-bleached coloration; loose position on dry sand above the waterline | Check current rules before considering collection |
| Uncertain | Dark color without obvious movement; possible remaining spines; partly buried position; damaged or recently dead appearance; poor visibility | Leave it where it is |
Living sand dollars are generally covered with small movable spines, while the familiar pale test becomes visible after the spines and soft tissues are lost. The Gulf Shores and Orange Beach identification overview describes living animals as darker and fuzzy and empty tests as becoming sun-bleached after death.
Texture and moving spines are more informative than color alone. If you can see short spines moving, the specimen is alive. A fuzzy or velvety covering should also end the collection decision, even if movement is difficult to detect.
Color is supporting evidence rather than proof. Lighting and wet sediment can change how a specimen appears. Recently dead sand dollars may retain darker coloration or some spines, while a bare pale test may remain underwater. Position in or out of the water cannot replace observation of the surface.
Use this decision rule:
If it is dark, spiny, fuzzy, moving, partly buried, or otherwise ambiguous, do not collect it.
Do not pick up a possible animal to make it produce a stain or to perform another handling test. Visible uncertainty is already enough reason to leave it alone. A photograph taken without moving the specimen is the better fallback.
If you accidentally lift a living sand dollar, return it promptly and gently to the same sandy area. This handling advice appears in a commercial field guide and should be treated as a minimal response to accidental disturbance, not an invitation to handle living animals.
This rule does not declare that collecting a living sand dollar is legal or illegal everywhere. Legal status depends on the exact jurisdiction. The purpose is to avoid turning an uncertain or visibly living animal into a souvenir.
Collect legally and search with minimal disturbance
Access to a beach does not automatically establish permission to remove natural objects. Rules may differ by beach manager, protected-area designation, adjacent waters, and the type of object involved. Because the evidence available here does not establish a current rule for any particular jurisdiction, this guide does not provide a statewide or nationwide collection rule.
Use this decision sequence:
- Identify the manager. Determine whether the beach is managed by a municipality, county, state, federal agency, tribal authority, private owner, or another entity.
- Read posted rules. Check entrance signs, beach notices, permit conditions, and temporary restrictions.
- Consult the current authority. Use the responsible park, wildlife, fisheries, refuge, or municipal source for the exact beach and date.
- Ask when necessary. Contact the beach office or responsible authority if the wording is unclear.
- Leave the test if uncertainty remains. A photograph records the encounter without risking removal where collection may not be allowed.
Do not rely on an old social-media post, an uncited travel article, or a rule quoted for another beach. Commercial beachcombing guides can suggest questions to ask, but they are not substitutes for the authority responsible for the site.
Minimal-disturbance searching also means staying out of posted restricted areas, avoiding digging and aggressive foot shuffling, and handling nothing merely for a photograph. Do not reposition a living sand dollar to improve the composition of an image.
Keep the method within accessible wet sand and calm, visible shallows. If the search would require deeper wading, a channel crossing, an offshore sandbar, or swimming, stop and treat that as a different activity requiring location-specific safety information.
When either life status or collection status is uncertain, observation and photography are the safest fallback.
Protect a legal empty test and troubleshoot an unsuccessful search
An intact empty test can chip, crumble, or snap before you reach the parking lot. Its broad, thin shape is vulnerable to bending, edge impacts, and pressure from heavier finds.
When lifting a clearly empty test that may legally be removed, support it flat on an open palm. Do not pinch the edge or hold it between two fingers. Avoid forcefully scraping off attached sand.
For the walk home, use a small rigid container lined with soft cloth or paper. It should:
- prevent the test from flexing;
- cushion it from impact;
- keep it from sliding;
- separate it from rocks and heavy shells; and
- remain protected from towels, coolers, and other beach equipment.
Field accounts offer different anecdotal opinions about whether multiple tests should be carried flat or stacked on edge. Neither orientation is established here as universally superior. The consistent principles are support, cushioning, separation, and protection from bending. A diver’s transport account similarly emphasizes padding because unprotected tests may shatter.
Do not place a test in a loose shell bag and then add rocks, sea glass, or large shells. A bag may prevent loss without preventing pressure or collisions. If you do not have a protective container, leaving the test may be more realistic than expecting it to survive the trip.
If your search produces nothing, troubleshoot the plan in this order:
- Confirm local occurrence. A sandy beach may not support an accessible sand-dollar population.
- Recheck the tide window. Useful flats may not yet have emerged, or the water may already have covered them.
- Change zones. Move between exposed wet sand, the surf line, shell deposits, and calm visible shallows without disturbing the bottom.
- Try clearer conditions. Return when outlines and ripple patterns are easier to see.
- Slow down. Search for rims, circles, and depressions rather than complete white discs.
- Accept the result. A promising-looking beach can yield no intact tests on a particular day.
Fragments may show that tests have been transported or broken by waves, but they do not guarantee whole specimens nearby. Enjoy them as evidence of shoreline movement rather than digging or moving farther into the water.
Keep finding and transport separate from cleaning and preservation. The available recipes involving bleach, glue, varnish, and similar treatments are inconsistent and do not provide dependable chemical-safety guidance. At the beach, focus on lawful collection, gentle support, and protected transport.
Before finishing, run through this field checklist:
- Timing: Consider a falling or low-tide period that exposes wet sand.
- Zones: Begin with newly exposed sand, then inspect the surf line, shell deposits, and calm ankle-deep water.
- Buried clues: Look for curved rims, partial circles, shallow depressions, unusual patches, and color contrasts.
- Life indicators: Spines, fuzz, movement, dark coloration, or uncertainty mean leave it.
- Rules: Verify the current collection policy with the authority responsible for the exact beach.
- Transport: Support a legal empty test and place it in a padded rigid container.
The method reduces to one responsible habit: plan for the local tide and rules, scan likely habitat slowly, and let any sign of life or uncertainty end the collection decision. Finding an intact empty test is never guaranteed, but a careful search can still reveal how sand dollars occupy and move through a changing shoreline without requiring you to disturb them.
Frequently asked questions
Is low tide really the best time to look for sand dollars?
Low tide is usually the most practical starting point because it may expose more wet sand, flats, and shallow bottom. Searching as the tide falls also lets you inspect newly uncovered ground. Regional guides, including an Oak Island low-tide search guide, recommend this approach, although their advice is local and should not be treated as a guarantee.
A predicted low tide is not automatically useful if access is closed, visibility is poor, or the available search area is unsuitable for you. Use current local tide information and favor observable, accessible shoreline over a particular clock time.
How can I tell whether a sand dollar is alive?
Look for short movable spines, a fuzzy or velvety covering, visible movement, and darker brown, purple, gray, or green coloration. Moving spines and surface texture are stronger indicators than color alone.
A likely empty test is bare, rigid, and often pale or sun-bleached. Because recently dead specimens may remain dark and empty tests may remain underwater, leave any ambiguous find in place.
Can a white dead sand dollar still be underwater?
Yes. A pale empty test can remain underwater, lodge in wet sand, or move with the surf. Water location alone does not establish whether a sand dollar is alive.
Observe the surface without lifting it. Spines, fuzz, movement, tissue, or uncertainty mean the specimen should remain undisturbed. Even a clearly empty test may be removed only if the rules for that beach allow it.
Is it legal to take an empty sand dollar home?
That depends on the exact beach and the authority responsible for it. This article does not establish a general possession rule or confirm the law for any particular jurisdiction.
Identify the beach manager, read posted notices, and consult the current official park, municipal, wildlife, fisheries, refuge, or other responsible source. If the answer remains unclear, photograph the test and leave it.
Should I look for sand dollars immediately after a storm?
No immediate post-storm search is necessary. Beachcombing accounts report that storm-driven waves may shift sand or deposit tests and fragments, but the same wave action can break fragile tests.
Treat a storm as a possible influence on the shoreline, not a guaranteed finding opportunity. Wait until the beach is open and suitable for an ordinary shoreline visit, then inspect accessible wet sand and the surf line without entering rough water.